Essential DIY Tips for UPVC Sliding Doors Repairs
What makes a UPVC sliding door work well? How can regular care stop expensive fixes? Oridow, a top name in UPVC door fixes, shares easy tips for keeping your doors running smoothly. With a simple guide, you can make your doors last longer and avoid significant repairs.
Fix problems early to keep your UPVC sliding doors working properly. Oridow teaches you to spot and resolve common issues quickly to keep your doors safe and secure for a long time.
Introduction to uPVC Sliding Door Maintenance
Oridow wants to help you fix simple door problems yourself. This saves you money and time. By keeping up with maintenance and quick fixes, you can enjoy your doors without worry for many years.
Key Takeaways
- Regular maintenance is essential for extending the lifespan of uPVC sliding doors
- Timely repairs can prevent costly replacements and reduce the need for uPVC sliding door maintenance
- Oridow provides practical tips for uPVC sliding door repairs to help homeowners perform basic repair tasks
- A simple uPVC door repair guide can help individuals identify and address common issues
- Preventive maintenance is key to ensuring the smooth operation of UPVC sliding doors
- By following Oridow’s expertise, homeowners can enjoy their doors’ efficient operation for years to come
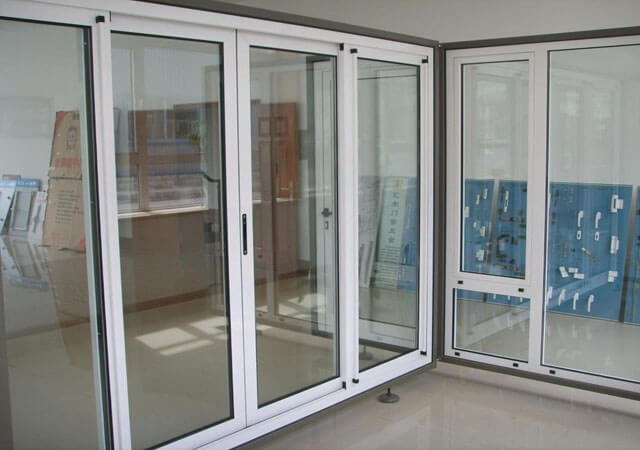
Understanding uPVC Sliding Door Components
Knowing the parts of uPVC sliding doors is key to fixing and keeping them working well. A good repair guide should discuss the track, roller, lock, and handle. Knowing these parts helps you spot and solve problems, improving your doors.
It is important to keep your uPVC sliding doors in good shape. Clean the track and oil the rollers often. This helps avoid problems and saves money on repairs. Knowing your doors’ parts is the first step to keeping them running right.
Track System Overview
The track system is crucial for uPVC sliding doors. It guides the doors as they move. Clean and oil the track and rollers to keep them working smoothly and prevent damage.
Roller Mechanism Basics
The roller mechanism is key for uPVC sliding doors. It helps the doors move quickly and supports their weight. A repair guide can teach you how to care for and fix this part, keeping your doors moving well.
Lock and Handle Assembly
The lock and handle are essential for uPVC sliding doors. They keep your doors safe and easy to use. Knowing how to care for and fix this part lets you keep your doors secure and working properly. Regular cleaning and oiling can also help them last longer.
Common Signs Your UPVC Sliding Door Needs Repair
uPVC sliding doors are tough and easy to care for, but they can have problems over time. Knowing when to fix them is key.
Signs that your uPVC sliding door needs fixing include trouble sliding, odd noises, or hard opening and closing. These problems might come from worn rollers, wrong tracks, or broken locks. Fixing these issues quickly prevents further damage and keeps your door working properly.
You might fix minor problems yourself to save money and time. But, for more significant issues, a pro is best. Some ordinary uPVC sliding door issues are:
- Sliding trouble from old rollers or tracks that aren’t straight
- Odd sounds from broken or loose parts
- Doors that are hard to open or close because of broken locks or handles
Knowing these signs and acting fast keeps your uPVC sliding door working well. Regular uPVC door troubleshooting also spots problems early, saving you money and time later.
Essential Tools and Materials for UPVC Door Repairs
To fix uPVC doors correctly, you need the right tools and materials. Start with essential tools like a screwdriver, pliers, and a wrench. For more demanding jobs, you might need a roller adjustment tool and a track cleaning brush.
Sliding door fixes are more straightforward with the right stuff. Safety is key, so wear gloves, glasses, and dust masks. These protect you from sharp edges and dust.
For cleaning, a soft cloth and mild detergent are good. Use a silicone-based lubricant to keep rollers moving smoothly.
Required Tools List
- Screwdriver
- Pliers
- Wrench
- Roller adjustment tool
- Track cleaning brush
Safety Equipment Needed
- Gloves
- Safety glasses
- Dust mask
Recommended Cleaning Supplies
- Soft cloth
- Mild detergent
- Silicone-based lubricant
Having these tools and materials ready helps with many uPVC door repairs. Always follow safety rules and use the proper methods for a good fix.
Professional Tips for UPVC Sliding Doors Repairs
Regular maintenance is key for repairing UPVC sliding doors. Simple tips can help prevent common issues. Cleaning the tracks and rollers often is a good start. Dirt and debris can cause friction and wear.
Knowing how to fix common problems is essential. If your doors stick or don’t slide right, it might be due to misaligned tracks or worn-out rollers. Learning to fix these issues can save you time and money. Here are some helpful tips:
- Regularly lubricating the rollers and tracks to reduce friction
- Checking and adjusting the door alignment to ensure proper functioning
- Cleaning the doors and frames to prevent dirt and debris buildup
Following these tips and regular maintenance, your doors will work smoothly for years. Always keep up with maintenance to avoid problems and keep your doors in top shape.
Track Maintenance and Cleaning Guidelines
Keeping the track system clean and well-maintained is key for smooth sliding door operation. If your sliding glass door is hard to open and close, it might be dirty or off track. Knowing how to fix these issues is essential.
It’s vital to clean the track regularly to avoid dirt buildup. Mix soap and water. Wipe it down with a soft brush or cloth for deeper cleaning. But always dry it well to prevent water spots.
Applying lubricant to the track helps it run smoothly. This reduces friction and prevents sticking. Always follow the lubricant’s instructions and use it correctly.
Regular Cleaning Methods
- Use a soft brush or cloth to wipe down the track
- Use a mixture of soap and water for more thorough cleaning
- Dry the track thoroughly after cleaning
Lubricant Application Techniques
Lubricant should be applied to the track regularly to reduce friction and prevent the door from getting stuck. Follow the manufacturer’s instructions for application.
Track Alignment Procedures
If your sliding door is off track, you need to know how to fix the sliding door off track. Check the track for any misalignment and adjust it. Ensure the track is aligned and secured to the door frame.
Roller Replacement and Adjustment Methods
Knowing how to fix your UPVC sliding door is key to keeping it working well. A common problem is a broken roller mechanism. With the right tools and knowledge, you can replace or adjust it. If DIY repairs seem daunting, look for sliding glass door repair near you to find a pro.
Replacing the roller mechanism involves several steps, including:
- Removing the door from the track
- Disassembling the roller assembly
- Inspecting and cleaning the track and rollers
- Installing new rollers and reassembling the assembly
Adjusting the roller mechanism is also essential for the door’s function. You can do this by changing the adjustment screws. This aligns the rollers with the track. For more complex issues, a professional can offer help fixing a sliding door.
Regular maintenance can prevent roller mechanism problems. This includes cleaning the track and rollers, applying lubricant, and checking for wear or damage. By following these tips and knowing how to fix a sliding glass door that won’t slide, you can enjoy smooth and effortless door operation.
Addressing Lock and Handle Mechanisms
UPVC sliding doors have locks and handles that need regular care. The cost to fix these parts can change based on the damage. It’s wise to fix problems early to save money.
Issues like misaligned locks, old handles, and broken latches are common. You can try fixing these by adjusting the lock, oiling the hinges, or swapping out parts. But for bigger problems, it’s best to get help from a pro to keep your door safe.
Troubleshooting Lock Issues
- Check the lock alignment and adjust it if necessary
- Lubricate the hinges and latch system
- Replace worn-out or damaged parts
It’s also good to consider making your door more secure. Adding anti-snap locks or strengthening the door frame can help. These steps can make your UPVC sliding door safe and working well while keeping repair costs down. Check online or talk to a pro for more tips on fixing your door.
Handle Repair Techniques
Fixing handles might mean replacing them, adjusting their position, or oiling the hinges. These steps can help you save money and make your door last longer.
Preventive Maintenance Strategies
Regular maintenance is key to avoiding common sliding door issues. One big problem is wear and tear on tracks and rollers. This can make the door hard to open or even jam. Knowing how to maintain the mechanism is vital to fixing this.
Some ways to keep your sliding door in good shape include:
- Regular cleaning of the tracks and rollers to remove dirt and debris
- Lubrication of the moving parts to reduce friction and wear
- Inspection of the door and its components to identify any issues early
By doing these things, you can avoid the downsides of sliding doors. These downsides include less functionality and higher maintenance costs. Knowing the common problems helps you take steps to prevent them.
Regular maintenance also makes your door last longer. This means you won’t have to spend much on repairs or new parts, and you can enjoy your UPVC sliding doors for many years by focusing on maintenance.
When to Seek Professional Help
Fixing a damaged UPVC door can be tough, like dealing with a broken sliding door lock or damaged argo glass. Knowing when to ask for help is key. For significant problems like broken glass or a lousy lock, you need a pro to keep you safe and the door working correctly.
Some signs you need a pro include:
- Severe damage to the door frame or panels
- Failed sliding glass door lock or handle mechanisms
- Extensive argo glass or glass repair needs
Cost is also essential when deciding to get help. While DIY fixes might seem cheap, they can cause more harm and cost later. A skilled technician can fix it right and avoid future problems.
When picking a pro, look for someone good at glass repair, sliding door locks, and Argo glass. A pro will check the damage and give a full fix plan, including the right parts and labor costs. Getting help when needed keeps your sliding door working well and safely. You’ll also learn how to fix a damaged Upvc door correctly.
Also Read,
What Exactly is Faux Wood? Your Complete Guide
Measuring an Aluminum Sliding Window: A How-To Guide
A Step-By-Step Guide To Fix An Aluminum Bifold
Aluminum in Architectural History: A Captivating Rundown
5 Practices That Can Damage Your uPVC Doors
All You Need to Know About Thermal Windows
Conclusion: Maintaining Your UPVC Sliding Doors for Longevity
Keeping your UPVC sliding doors in good shape is essential. Regular cleaning and oiling of the track and rollers prevent damage. Also, fixing any lock or handle problems quickly keeps your doors safe and working well.
Are you thinking about replacing your UPVC door? Consider the cost against the benefits of new, energy-saving windows or French doors. Being proactive with upkeep and watching out for problems can make your doors last longer, so you can enjoy your sliding glass and front doors for many years.
FAQ
How can I troubleshoot common issues with my UPVC sliding doors?
If your UPVC sliding door is hard to open or close or makes strange noises, it might need fixing. Check the track, rollers, and locks for dirt, damage, or if they’re off track.
What are the essential tools and materials needed for UPVC door repairs?
You’ll need a screwdriver set, pliers, lubricant, and cleaning. Don’t forget safety gear like gloves and eye protection. Having the right tools is key to a safe and successful fix.
How do I properly maintain the track system of my UPVC sliding door?
Keep the track clean and well-lubricated. Wipe it down with a soft cloth and mild cleaner. Then, a silicone-based lubricant is applied for smooth movement. Make sure the track is straight for the best results.
What are the common problems with UPVC sliding door locks and handles, and how can I fix them?
Locks and handles might stick or be hard to use. Check for dirt or if they’re not aligned correctly. Get a pro’s help for big problems or to boost security.
When is it necessary to seek professional help for UPVC sliding door repairs?
Get a pro if you see big damage like a bent track or broken rollers. Also, if you’re unsure about the repairs or feel uneasy doing them, hiring a skilled technician is safer.

