
Proper installation is vital for aluminium tilt-turn windows.
Buying new windows is a big step. Installing them is just as important. A perfect window can fail. It can fail with a bad installation. An improper job causes problems. It causes air leaks. It wastes energy. It can even lead to water damage. Installing aluminium tilt-turn windows is a precise job. It is not like a simple home project. These windows have special features. They need careful handling. This guide gives you key tips. It helps you understand the process. We will talk about why professional installation is the best choice. This ensures your aluminium windows work perfectly for years.
Key Takeaways
- Professional Job: These windows are complex. A professional installer ensures a perfect, airtight fit.
- Measure Correctly: Accurate measurements are the first step. They are very important.
- Rough Opening: The wall opening must be ready. It must be clean and strong.
- Levelling and Shimming: Use shims to make the frame level. This is key for the window to work right.
- Proper Sealing: Seal the window frame to the wall. This stops drafts and water leaks. It keeps your home safe and efficient.
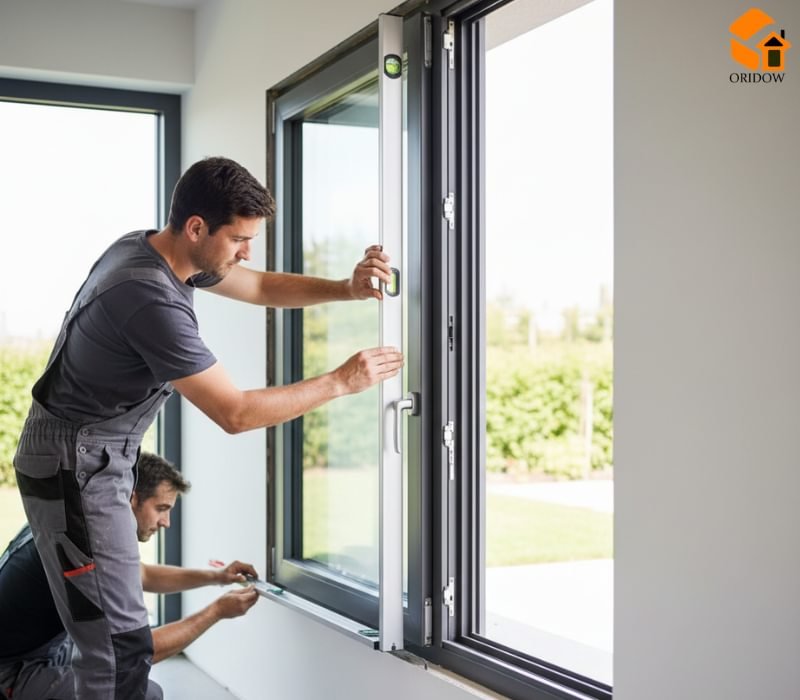
Why Professional Installation is Important?
Installing a window is more than just putting it in a hole. It needs precision. Aluminium tilt-turn windows have complex hardware. The hinges and locks must be set just right. A small mistake can cause big problems. It can make the window hard to operate. It can make the seals not work. This ruins the energy efficiency. It can also cause problems with security.
A professional installer knows these windows. They have the right tools. They have the experience. They can handle problems on-site. They will ensure the window is level and square. This makes sure the tilt and turn functions work smoothly. They will also seal the window properly. A bad seal wastes a lot of energy. It can lead to mould and rot. Paying for an expert is a smart investment. It protects your new windows. It protects your home.
Tools and Materials for Installation
A good job needs the right tools. Here is a list of what a professional uses:
- Drill: For pilot holes and screws.
- Level: A long level is best. It ensures the window is perfectly straight.
- Measuring Tape: For very accurate measurements.
- Shims: Small plastic or wood pieces. They are used to level the frame.
- Sealant and Caulk: For sealing gaps. A good quality exterior-grade sealant is a must.
- Weatherproofing Tape: This tape is applied to the rough opening. It stops water from getting in.
- Screws: The right screws are needed to anchor the frame.
A professional will have all these. They will know how to use them. This is part of the value they offer. Oridow ensures our installers have what they need. We use the best materials for our products. This includes our aluminium doors and uPVC windows.
Installation Step-by-Step
The process has a few key steps. Each step must be done right.
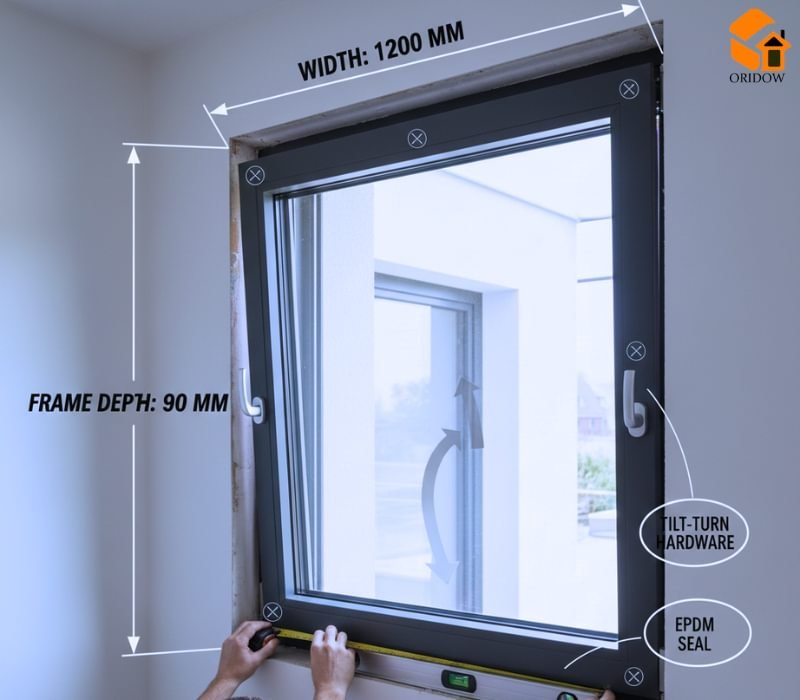
Step 1: Measure and Prepare
First, you measure the opening. It is called the rough opening. You measure width and height. You measure in a few places. You take the smallest measurement. The new window must be a bit smaller. This leaves room for shims and insulation. The rough opening must be clean. Old screws and debris must be removed.
Step 2: Dry Fit and Shimming
The installer puts the window in the opening. It is a “dry fit.” This is a test. They check if it fits. Then they use shims. Shims are placed at the bottom. They raise the window to the right height. More shims are added on the sides. They make sure the frame is perfectly level. They use the level tool here. This is a very important step.
Step 3: Anchoring the Frame
The frame must be secure. It is fastened to the wall. Screws are put in through the frame. They are put into the wall studs. The shims keep the frame straight. The installer checks the level again. The window must not be twisted. A twisted frame will not operate well. It will not seal properly.
Step 4: Sealing the Gaps
This is a vital step. Air and water must not get in. The installer uses low-expansion foam. This foam fills the space around the frame. It also acts as an insulator. Then they use sealant or caulk. They put a bead of sealant all around the outside. This creates a waterproof seal. Oridow products are made to seal well. This ensures great energy efficiency for your home.
Step 5: Final Adjustments
After the main install, they test the window. They open and close it. They use the tilt and turn functions. They check if it works smoothly. If it is a little tight, they adjust the hinges. They make sure the window locks well. This ensures everything is perfect.
Common Mistakes to Avoid
Mistakes happen. But some are costly.
- Wrong Measurement: A window too big will not fit. A window too small will have big gaps.
- Not Levelling the Frame: A frame that is not level will cause problems. The window will not close properly. It will be hard to lock.
- Bad Sealing: Gaps in the sealant let air and water in. This wastes energy. It can also damage your wall.
- Using the Wrong Tools: Using a hammer instead of a rubber mallet. Using the wrong screws. These small things can damage the window.
A professional avoids these mistakes. They save you time and money. For our Impact Windows, a proper seal is even more important. It ensures they can withstand storms.
The Oridow Promise
At Oridow, we stand by our products. We offer many types of windows. We have aluminium windows and uPVC windows. We also have Awning Windows and Jalousie Windows. We make sure they are high quality. But we also know installation is key. We can connect you with experienced professionals. They know our products. They will ensure the job is done right.
Proper installation ensures our products perform their best. Our Pivot Doors and Swing Sliding Doors are also made with this in mind. They are easy to install for a professional. For more information, you can contact us. Our email is sales@oridow.com. You can call us at 86 131 7030 0715.
Conclusion
Installing aluminium tilt-turn windows is not a DIY job. It is a job for experts. A proper installation ensures the window works as it should. It ensures it is energy efficient and secure. It protects your home from the elements. By choosing a professional, you protect your investment. You get the full benefits of your new windows. We hope these tips help you. Remember, a good window is only great with a good install.
Learn More,
Are Aluminium Tilt-Turn Windows Energy Efficient?
The Complete Guide to Aluminum Tilt-Turn Windows
Secure & Sleek: Why You Need Sliding Windows
Your Guide to Installing Aluminium Sliding Windows
FAQs
Is it hard to install a tilt-and-turn window?
Yes, it is harder than it looks. These windows have complex hardware. They need to be perfectly level. The seals must be airtight. It is best to hire a professional installer. They have the skill and tools.
Can I install a tilt-turn window myself?
You can try. But it is not recommended. A small mistake can cost a lot. It can make the window not work properly. It can lead to drafts and water damage. A professional does the job quickly and correctly.
How long does it take to install a new window?
It depends on the window. A single window can take a professional a few hours. The process is fast for them. A DIY person will take much longer. They may miss a step or two.
What are shims used for in window installation?
Shims are small pieces of wood or plastic. They are used to level the window frame. They are placed at the bottom and sides. They make sure the frame is perfectly straight. This is key for the window to open and close smoothly.
How do you seal around a new window?
You use special sealant or low-expansion foam. The foam is put in the gap around the frame. It insulates and seals. A bead of silicone caulk is then used on the outside. This stops water from getting in. A good seal is very important.
What is a rough opening for a window?
A rough opening is the hole in your wall. The new window will go inside this opening. It is a bit bigger than the window. This space is needed for shims and insulation.
What is the difference between a retrofit and a full-frame installation?
A retrofit installation keeps the old frame. A new window is put inside it. A full-frame installation removes the old window and its frame. A new window and frame are put in. Full-frame is usually better for efficiency.
Why is it important to level a window frame?
Levelling is very important. If the frame is not level, the window will not work. It may not close fully. The locks may not work right. A tilted frame will put stress on the hardware.
What tools do you need to install a window?
You need a drill, a level, a measuring tape, shims, and sealant. You also need a saw and other common tools. A professional will have all of them. They will know how to use them.
Do you caulk the inside or outside of a window?
You caulk the outside. This stops water from getting in. You use a good exterior-grade caulk. The inside is also sealed. You use a different type of sealant inside.

